Doll Makeup Using Washable Markers

American Girl doll makeup

Hey, guys! :)

Today, I’m going to show you five ways to do your dolls’ makeup with washable markers. It’s easy, doesn’t harm them in any way, and it’s the perfect way to tie together their look.

Note: there is some risk involved in this, as your doll could get silver eye from the water, and using the wrong kind of marker can stain their skin.

American Girl doll makeup | supplies

All you need are three common items everyone has in the house: a bowl of warm water, fine washable markers (I’m using Crayola), and a washcloth/towel. (The markers have to be washable!)

American Girl doll makeup | lipstick

#1: Lipstick

Get whatever color marker you want (red and pink are best) and draw over the doll’s lips. If you mess up, dip the corner of your washcloth in warm water and wipe away the marker. Just be careful not to get any on the teeth, because it’s hard to get the cloth in there to clean it off.

American Girl doll makeup | eyeliner

#2: Eyeliner

Using a black marker, draw a thin line over the top of the doll’s eye, and when you get to the outer edge, make a tiny wing.

Wiping off the eyeliner is kind of scary, because it’s possible the water will drip and she’ll get silver eye. It hasn’t happened yet, though.

American Girl doll makeup | eyeliner

When I do their eyeliner, I close the doll’s eyes by tucking some of the lashes into the bottom part of the eye. This way, I can hold her any way I want without her eyes opening and closing and getting in the way of my marker.

American Girl doll makeup | eyeshadow

#3: Eyeshadow

I have Crayola SuperTips, which comes with eighty fine tipped washable markers. There are lots of pastel colors, and I used one of those for the eyeshadow, because I didn’t want it to be too bold.

The eyeshadow is really simple: just draw above the eyeliner, and you’re done.

American Girl doll makeup | freckles

#4: Freckles

Take a brown marker and make little dots below her eyes and on her nose. For a more realistic look, make the dots different sizes. If you want the freckles to be less defined, gently pat them with a damp washcloth.

American Girl doll makeup | nail polish

#5: Nail Polish

(This isn’t technically makeup, but it looks cute and I wanted to include it.)

Some people put real nail polish on their dolls, and while it looks nice, it can stain and taking it off can make the vinyl a weird color. Using markers instead is a much easier way to do it.

You can also use it like face paint, which is how I created the vampire and zombies from my Halloween photostory.

So far, the marker has always come off without much work. Still, I wipe it off as soon as I’m done taking pictures because I don’t want to risk it.

I hope you guys enjoyed the post! Will you be doing your dolls’ makeup soon?

xo

Loren
DIY Doll Shower

I’ve got an awesome craft prepared for you guys today: a shower made out of an American Girl doll box. Enjoy!

Supplies:

-American Girl doll box

-masking tape

-paint (gray, white, red, and blue)

-kebab skewer

-pencil

-scissors

-hot glue gun

-thin fabric (for shower curtain)

-small drawer pull (round)

-Mod Podge

-milk jug lid

-silver spray paint

-metal coathanger

-wire cutter

-glass/ceramic tiles (small)

-medium-sized pom pom (any color)

-cord/yarn (same color as pom pom)

-self-adhesive hook

-Sculpey (any color)

-cardboard

-old towel

-sewing pin

The first step is to prepare the box. Rip out all the pieces of tape stuck to the inside. Don’t worry if some of the paper peels off, too. If that happens, just paint over it with light gray.

There are two holes at the bottom of the box and a slit near the top. Cover them in masking tape and paint over them.

Next, hold a kebab skewer across the front of the doll box. Mark where it meets the inside of the box (7 5/16 in.) and cut there. This is the shower rod.

To make the shower curtain, first pick the fabric that you want to use (mine is from an actual shower curtain). Cut it to 16 ½ in. x 7 ¼ in. Then fold the top over about half an inch and hot glue it down, creating a loop. Feed the dowel rod through it.

To keep the fabric from unraveling, fold every unfinished edge over about ¼ in. and hot glue it down.

Attach the shower curtain to the box by hot gluing the ends of the rod.

For the shower dial, take a small drawer pull and paint a line of red on one side and a line of blue on the other. Once it’s dried, brush Mod Podge over it so it won’t rub off.

Use a pencil to poke a hole in the side of the box (I made the hole on my left). Stick the drawer pull through the hole.

Next, make the shower head. I covered a milk jug lid with masking tape and spray painted it silver (the tape was so the paint would stick better). But if you don’t have spray paint, I think acrylic would work, too.

Using wire cutters, cut the top off a metal coathanger just above the curve (you might need an adult’s help with this). Then hot glue the end of the hanger to the lid.

Glue the shower head to the box above the dial. Try to get it as close to the top of the box as you can, or else your doll won’t be able to fit in the shower without hitting their head on it.

Now we’re going to do the floor. Draw a circle on the bottom of the box. Paint gray lines across it for the shower drain.

This part takes a long time, but the results are worth it. Glue small glass/ceramic tiles to the floor around the drain. If you don’t have tiles, scrapbook paper or paint will look nice, too.

I used tile nippers to break some pieces apart so I could glue them into small spaces.

Now that the shower itself is done, it’s time to make some cute accessories!

Loofah/poofy scrubby thing:

All you need is a pom pom, cord or yarn, and hot glue.

Cut the cord to the length you want, but make sure it’s long enough that a doll’s hand can fit through it. Then hot glue the ends of the cord to the center of the pom pom.

Glue a self-adhesive hook (or bent wire) to the same wall that the dial and shower head are on. Hang the loofah on it.

Soap:

Make a rectangle out of Sculpey (mine is 1 ¼ in. x 15/16 in.). Bake it according to the directions on the package. When it’s cool, cover it in Mod Podge so it will dry shiny.

To make a shelf for the soap, cut a piece of cardboard that’s 2 in. x 1 ¼ in. Paint it light gray and glue it to the wall by the loofah’s hook.

Towel:

Take an old hand/bath towel and cut it to 15 ¼ in. x 7 ½ in. Wrap it around your doll and secure it with a sewing pin.

These tiny bottles of soap and hair products are freebies from hotels.

Now you have a cute shower for your dollhouse!

Hope you guys enjoyed this tutorial! If you make this, I’d love to see pictures. Email them to me at happyhouseofag@gmail.com.

It took me two days, several burnt fingers, and three broken nails to make this shower. I ran out of tiles when I was almost done, so I had to go buy some more, but they weren’t the same size. I ended up having to tear out nearly all the tiles and redo the whole floor. Moral of the story: make sure you have enough tiles before you start!

xo

Loren

DIY Clock for Your Dollhouse

It’s been a couple of months since I last posted a craft, so I thought it was about time for another one. I’ve been reorganizing my dollhouse, and I decided to create a cute clock to go in the living room. I hope you guys like it. :)

You will need:

  • Two colors of foam
  • A cup
  • Hot glue gun
  • Scissors
  • Pencil
  • Sharpie
  • Rhinestone stickers (optional)

(The foam I used was extra thick, but normal sheets of foam work just as well.)

Place the cup upside down on one sheet of foam. Trace around the rim, then cut out the circle. This will be the base of your clock.

Cut another circle out of the second color of foam. Fold it in half and cut out the center, so you have a ring.

Hot glue the foam shapes together.

Use your Sharpie to write the numbers on the face of the clock.

Cut two small rectangles out of the second color of foam. One should be short and wide, and the other should be slightly longer and thinner. Glue them to the center of the clock. If desired, stick a rhinestone on top of the hands of the clock for the final touch.

Attach your new clock to the wall using double sided tape.

If you make this, I’d love to see photos! You can send them to me at happyhouseofag@gmail.com.

-Loren

DIY Doll Beanie

I’ve come up with two no-sew ways to make adorable doll beanies. Enjoy. :)

Using a sweater.

You will need:

  • Old sweater
  • Scissors
  • String

1-dsc_0200

Start by fitting one of the sweater’s sleeves over your doll’s head.

2-dsc_0202

Cut off the sleeve, making sure to leave some extra fabric on the end.

3-dsc_0205

Turn the sleeve inside out and put it back on the doll’s head. Cut a piece of string and wrap it tightly around the sleeve where you want the end of the hat to be. Tie it off and trim the string.

4-dsc_0206

Snip off the excess fabric.

5-dsc_0210

Turn it the right way out and slip it onto your doll’s head.

Using a sock.

You will need:

  • Sock
  • Scissors

6-dsc_0211

Take a sock and cut just below the heel.

7-dsc_0214

Put the toe end of the sock on your doll.

It’s that easy, that’s the whole DIY. XD

I hope you guys liked it! If you make a beanie following these instructions, you can send a picture to me using the email address happyhouseofag@gmail.com. I’d love to see what you guys made.

-Loren

DIY Doll Halloween Candy

Oh, yes: another Halloween DIY. But it’s OK, this is (probably) going to be my last craft for awhile.

So . . . yeah! Doll Halloween candy. Enjoy.

Taffy

01-dsc_0346

Place a bead in the center of a square of tissue paper.

02-dsc_0347

Twist the paper, twirling the ends in different directions.

*

*

Rock Candy

03-dsc_0350

Cut a skewer to about two inches long. Hot glue beads to one end.

*

*

Lollipop

04-dsc_0353

Glue a large bead to the end of a skewer (about two inches long).

05-dsc_0355

Cut a square of tissue paper. Twist it around the bead.

*

*

Chocolate

06-dsc_0358

Glue two rectangles of brown foam together. Then make a label out of paper and Sharpie. Wrap the label around the foam and glue in place.

*

*

Candy Corn

07-dsc_0361

Take three beads: one yellow, one orange, and one white. Stack them on top of each other and glue them in place. (Try to make the white one smaller than the others, but it you can’t, it’s no big deal.)

*

*

Peanut Butter Cup

08-dsc_0362

Take a bottle cap and color it orange, using either paint or Sharpie. Cut a circle out of brown foam and glue it inside the bottle cap.

*

*

Chocolate Kiss

10-dsc_0369

Cut a square out of aluminum foil and place a bead in the center of it. Twist the foil around the bead. Take a sliver of paper and slip it in the end of the twist.

*

*

Gummies

09-dsc_0365

I have bear-shaped beads that can serve as gummy bears. If you have any animal-shaped beads, create a package out of plastic wrap and tape and put the beads inside.

-Loren

DIY Jack-o-Lantern Bucket

poster1

Your dolls need a way to carry around their candy this Halloween! I’ll show you how to make a cute jack-o-lantern bucket.

1-dsc_0319

You will need:

  • Yarn
  • Black foam
  • Hot glue gun
  • Scissors
  • The bottom half of an orange Easter egg

2-dsc_0320

Cut two triangles and a D-shape out of the black foam. (Try making different faces, too!)

3-dsc_0323

Glue them to the Easter egg.

4-dsc_0325

Cut a piece of yarn and glue the ends to the inside of the Easter egg. Instead of placing the yarn directly in the middle of the egg, I would recommend gluing it closer to the face. This way, the side the face is on will tip up, so you can see it better.

7-dsc_0328

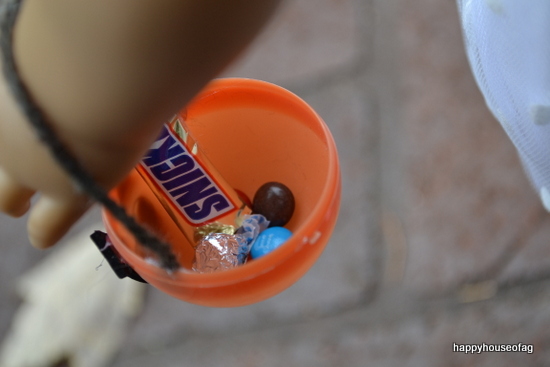
Fill with tiny candy and enjoy!

6-dsc_0327

5-dsc_0326

-Loren